Username:

Password:

Fargot Password? / Help

Binding

0

Animated walk cycles

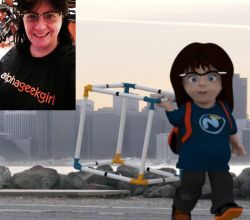
For anyone who is not a full-time rigger or animator, but has tried to create a simple walk cycle, you'll no doubt remember all the time and effort you put in, only to have your character walk like a zombie. Well,  a fellow MODOnaut, Michael Gass, has created this animated walk-cycle script for ACS rigs that will help you out immensely. Even if it's not perfect, it will get you well on your way!

9.3/104votes
Voting statistics:
RatePercentageVotes
1050%2
925%1
825%1
70%0
60%0
50%0
40%0
30%0
20%0
10%0
0

How to scale your rigged character

Description

As a follow-up to last week's rigging article, I thought I'd share this tip I found in a forum post recently where someone asked;

"Hi guys I rigged a character in one file to have it clean, then I posed it for a test and took him to other scene where he is too big. I tried to scale him but it destroys the whole character (the skeleton resizes at diferent rate than the mesh does). I tried to scale the skeleton, the mesh, both, a group...and nothing works. Any ideas?"

Scale
Solution If you select the root joint of your skeleton, and then scale, everything else should go along for the ride. Make sure you do the scaling outside of Setup mode.
Source (Old Luxology Forums - no longer exists)
 
10.0/102votes
Voting statistics:
RatePercentageVotes
10100%2
90%0
80%0
70%0
60%0
50%0
40%0
30%0
20%0
10%0
2

How to quickly rig a character

Description

With modo 601 came a video called Fireboy where Andy Brown rigs and animates one of Warner McGee's characters. The video is quite detailed, but if you just want to quickly jump in and rig a character, I've broken it down into simple steps below.

Once you are done though, you may find that you might need to use a different Binding type for your particular character, or you might need to adjust the vertex weights to enable your character to deform properly, which I'll try cover in another article later on. But until then you can always refer back to Andy's video - but this should get you on your way.
Step-by-Step
    Preparation
    • Make sure your character is a nice clean mesh without holes or flaws. Just to be sure, run > Geometry > Mesh Cleapup before you start.
    • Separate the components, such as body and eyes into separate layers.
    • Centre your character at X & Z, and zero on Y
     
    Create Skeleton
    • Click on the Setup tab along the top menu
    • Under Commands select > Setup > Skeleton
    • Then click on Tool Properties tab and make sure that Compensation and Intersection are turned on (2:20)
    • In Add-mode, create your skeleton. Be mindful of when to use symmetry, and when to turn it off.
    Align Bones
    • Double-click on the root bone (in the viewport, or from the Item List)
    • Adjust all joint locators so that the red line is pointing along the X-axis by selecting each joint individually, then clicking on the universal transform tool to move it. It's quicker if you have two viewports open side-by-side - one Front, and one Right to make seeing where you're at, easier. (5:55)
    Zero out transforms on all joints (Sets a resting position for deformations)
    • Go into Setup modo. A yellow border will apart around the viewport
    • Double-click on the root bone
    • Go to > Properties > Zero > All
    • Turn off the Setup mode toggle
    • Save
     
    Bind skeleton to Mesh
    • While in Item mode, select Setup mode
    • Double-Click on the root bone in the viewport, and then Shift-select the character mesh
    • Then under  > Commands > Deformers > Bind > Heat  (you can use any of the other options)
Source  Fireboy.mov which comes with modo 601
Author  Andy Brown
   
10.0/103votes
Voting statistics:
RatePercentageVotes
10100%3
90%0
80%0
70%0
60%0
50%0
40%0
30%0
20%0
10%0